
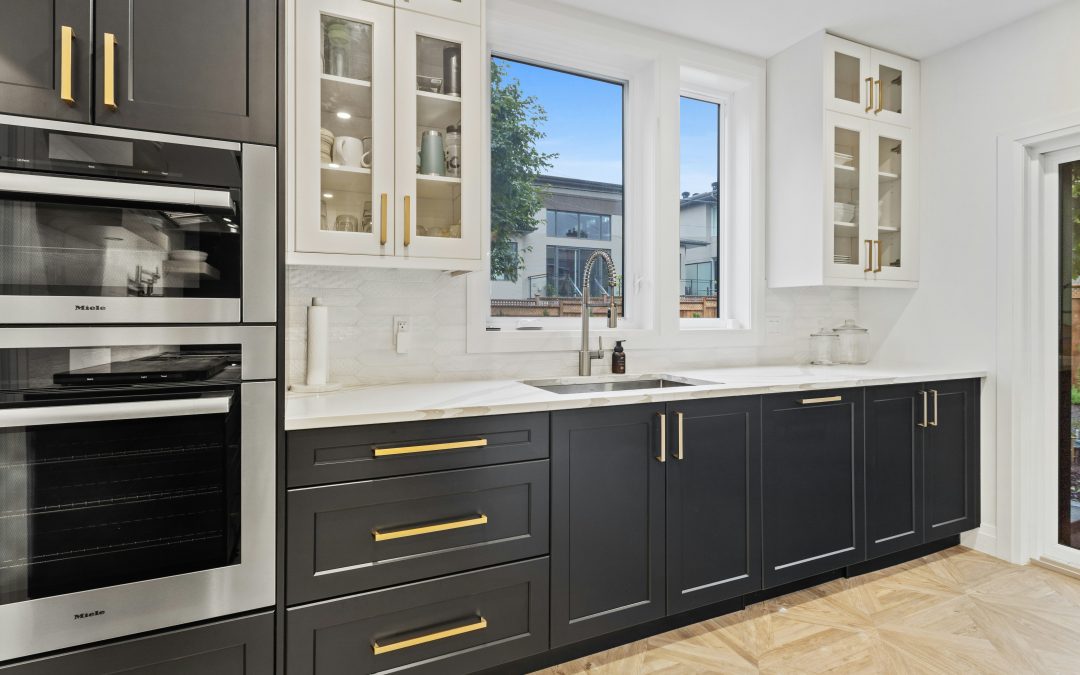
If you’ve been dreaming of updating your kitchen or bathroom but dread the thought of a full renovation, painting cabinets with chalk paint might be the perfect solution. Chalk paint has become one of the most popular DIY materials for giving furniture and cabinets a fresh, modern look—without the need for sanding, stripping, or priming. It’s easy to apply, dries quickly, and creates a soft matte finish that works with everything from farmhouse to contemporary styles. Whether you’re a first-time painter or a seasoned DIYer, this guide will walk you through everything you need to know about painting cabinets with chalk paint.
Why Choose Chalk Paint for Cabinets
Chalk paint, originally popularized by designer Annie Sloan, is known for its versatility and user-friendly nature. It’s made to stick to almost any surface, including wood, laminate, and even metal, without requiring heavy prep work. Here’s why so many homeowners prefer chalk paint for cabinets:
- No sanding or priming required: Saves time and mess.
- Quick drying: Perfect for weekend projects.
- Matte, velvety finish: Creates a smooth, elegant look.
- Customizable colors: Can be mixed, layered, or distressed for unique effects.
- Low odor and water-based: Safe for indoor use, even in small spaces.
Plus, chalk paint adheres so well that even old or glossy cabinets can look brand new with minimal effort.
Step 1: Prepare Your Cabinets
Even though chalk paint doesn’t need sanding, proper preparation ensures a professional finish. Start by removing all cabinet doors, drawers, and hardware such as handles and hinges. Label them so you’ll know exactly where each piece goes later.
Next, clean thoroughly—this is the most important step. Use a degreaser or a mix of warm water and mild dish soap to remove grease, oil, and dirt. Kitchens especially tend to collect residue from cooking. Wipe everything dry before you start painting.
If your cabinets have deep scratches or chipped wood, fill those areas with wood filler and sand lightly for a smooth surface. This extra step will help your chalk paint adhere evenly.
Step 2: Choose the Right Chalk Paint and Tools
Chalk paint comes in a wide range of brands and finishes. Popular options include Annie Sloan Chalk Paint, Rust-Oleum Chalked, and Behr Chalk Decorative Paint. Pick a color that complements your space—neutral tones like white, gray, and beige create a timeless look, while bold shades like navy, green, or charcoal add personality.
For tools, you’ll need:
- A quality paintbrush or foam roller (natural bristles work best)
- A small angled brush for corners and edges
- A clean lint-free cloth
- Painter’s tape to protect walls and counters
- Drop cloths to prevent drips on floors
Step 3: Apply the First Coat of Chalk Paint
Before painting, stir your chalk paint thoroughly to mix the pigments. Begin with a thin first coat using smooth, even strokes. Don’t overload the brush; chalk paint covers well even in thin layers. Work in sections, painting the cabinet doors, drawers, and frames separately.
It’s normal for the first coat to look a little uneven or streaky. That’s part of the charm of chalk paint—it levels out beautifully after the second coat. Let the first coat dry completely for at least one to two hours, depending on humidity.
Pro Tip: Keep your brush strokes in the same direction for a more polished finish, or crosshatch strokes if you prefer a textured, rustic look.
Step 4: Apply the Second Coat
Once the first coat is dry, apply the second coat to achieve full coverage and a richer color. This layer will smooth out the texture and give your cabinets that signature chalky finish. Again, allow it to dry thoroughly.
If you’re aiming for a distressed or vintage style, lightly sand the edges and corners after the second coat using fine-grit sandpaper. This technique reveals hints of the original color underneath, adding depth and character.
Step 5: Seal the Paint for Durability
Chalk paint has a beautiful finish on its own, but it’s also porous, meaning it needs a protective seal to withstand daily use—especially in kitchens and bathrooms. You have two main options:
- Chalk Wax: This gives a soft, satin sheen and deepens the color slightly. Apply it with a wax brush or lint-free cloth in thin, circular motions. Buff with a clean cloth once it dries.
- Polycrylic or Water-Based Topcoat: Ideal for high-moisture areas, it provides a tougher, more durable surface while maintaining a low-sheen finish.
Apply two coats of your chosen sealer, allowing each to dry completely before reattaching hardware.
Step 6: Reassemble and Style Your Cabinets
Once your paint and topcoat are fully dry, reattach doors, drawers, and hardware. You can even replace old handles with new ones for an extra touch of style. Step back and admire your work—you’ve just given your cabinets a total makeover without breaking the bank or hiring a professional.
Maintenance Tips for Chalk-Painted Cabinets
Chalk-painted cabinets are surprisingly easy to maintain. To keep them looking fresh:
- Wipe spills immediately with a damp cloth.
- Avoid harsh chemicals or abrasive scrubbers.
- Refresh the wax coat once or twice a year for added protection.
- If you notice minor scuffs, lightly touch them up with leftover paint.
The durability of chalk paint increases over time as the finish cures, meaning your cabinets will keep their charm for years.
Design Ideas and Inspiration
Painting cabinets with chalk paint isn’t limited to a single style. Here are a few popular ideas:
- Farmhouse Chic: Use soft whites or creams with distressed edges and brass handles.
- Modern Minimalist: Go for matte black or charcoal gray with sleek hardware.
- Coastal Vibe: Try light blue or seafoam green paired with white countertops.
- Vintage Look: Mix colors—paint the top cabinets in one tone and the bottom in another for a stylish contrast.
Chalk paint adapts easily to your taste, making it perfect for both subtle upgrades and bold transformations.
Conclusion
Painting cabinets with chalk paint is an affordable, creative, and beginner-friendly way to refresh your home. It requires minimal prep, offers stunning results, and allows endless customization. Whether you’re updating a tired kitchen, modernizing a bathroom, or transforming old furniture, chalk paint delivers professional-quality results with minimal effort. With the right tools, a few hours, and a bit of patience, you can give your cabinets a brand-new look—and fall in love with your space all over again.